3 kinds
SNAPSHOT · SEQUENCE · VIDEO
Screenshots, timelapses and screen recordings of the Blender window, started from a panel in the 3D Viewport sidebar. No second app to launch, no window to line up, no files to rename afterward.
 // simple-capture.frame
Showing your work usually means a second program: a screenshot tool for stills, a recorder for video, something else for a timelapse, and each one has to find the Blender window first. Simple Capture puts all three kinds of capture on one panel in Blender's sidebar, already pointed at the window. Every file lands in one folder, numbered in order.
Each one is a button on the same panel, and each one writes ordinary files to the same folder.
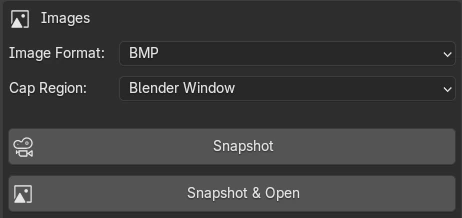
One click saves the Blender window as a single image. Use it for progress shots, manuals and thumbnails.
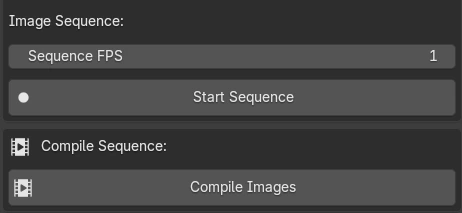
Saves a frame every second while you work, then compiles the frames into one MP4. Capture at 1 FPS, compile at 30, and an hour becomes two minutes.
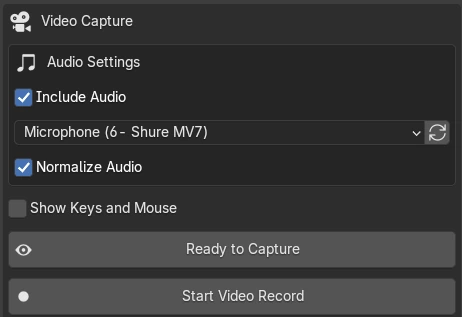
Records the window as you work, with your voice if you want it. Ready to Capture hides the panel and puts Record, Pause and Stop in the viewport header.
Snapshot, timelapse and video recording, start to finish, on the real panel.
// narrated · covers using the add-on, not installing it
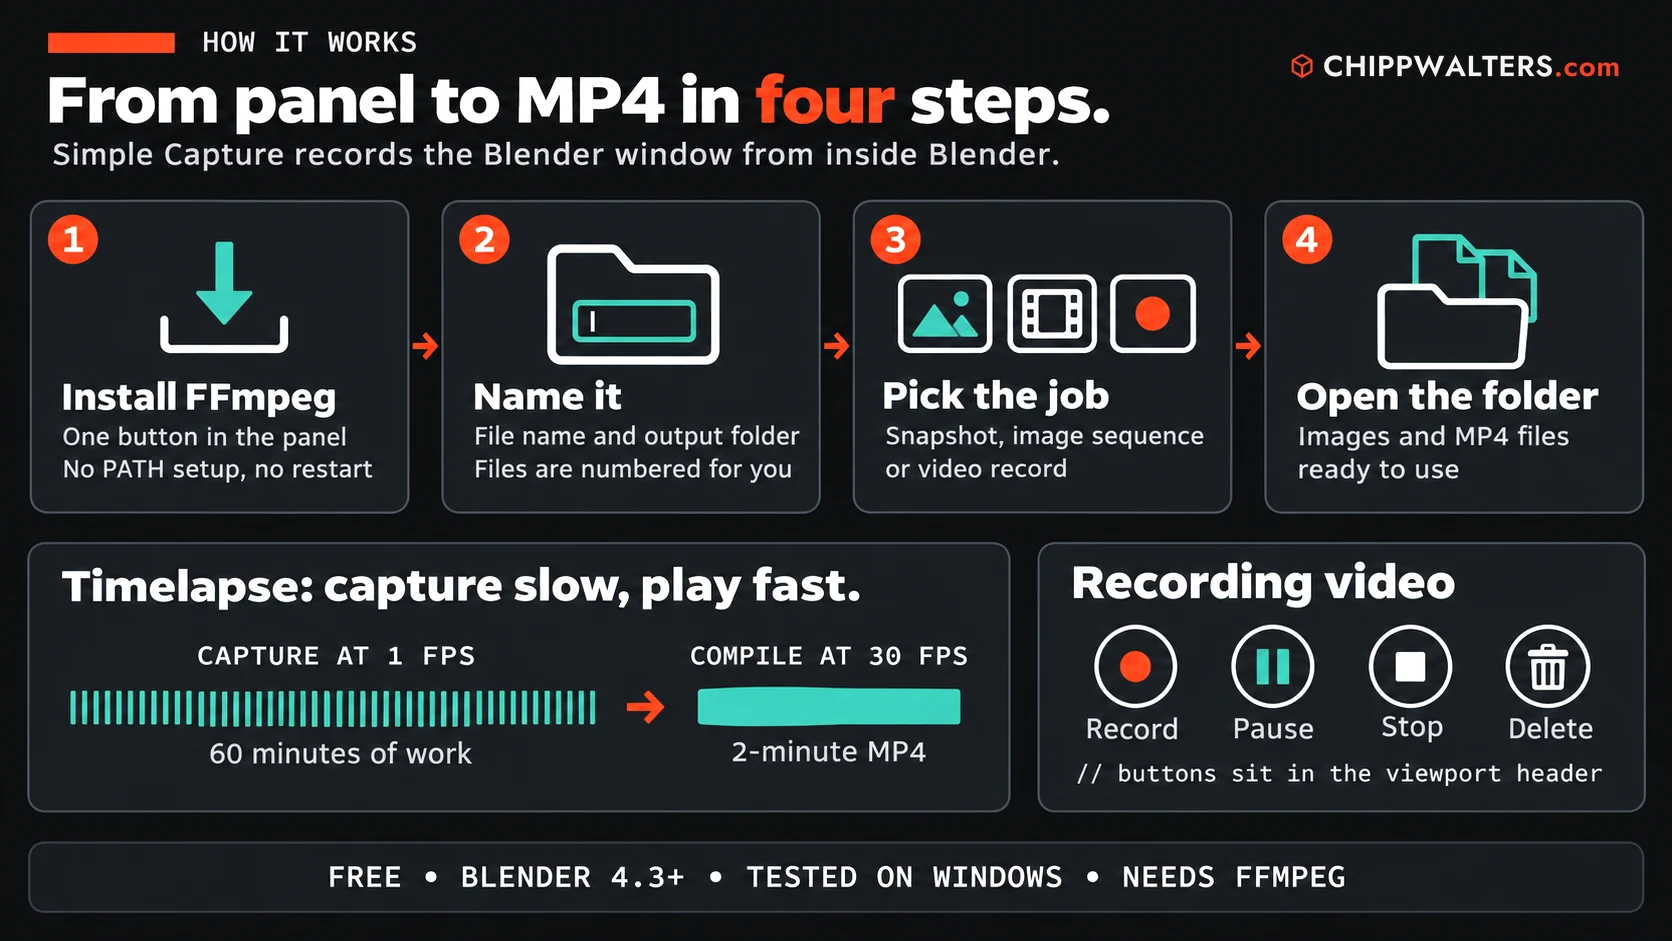
// the four steps, the timelapse math, the recording buttons
Open full-size diagram ↗One setting drives both halves: Sequence FPS. Set it to 1, press Start Sequence and work; FFmpeg writes the frames in the background, so Blender stays responsive. When you're done, set it to 30 and press Compile Images. An hour of modeling becomes a two-minute MP4.
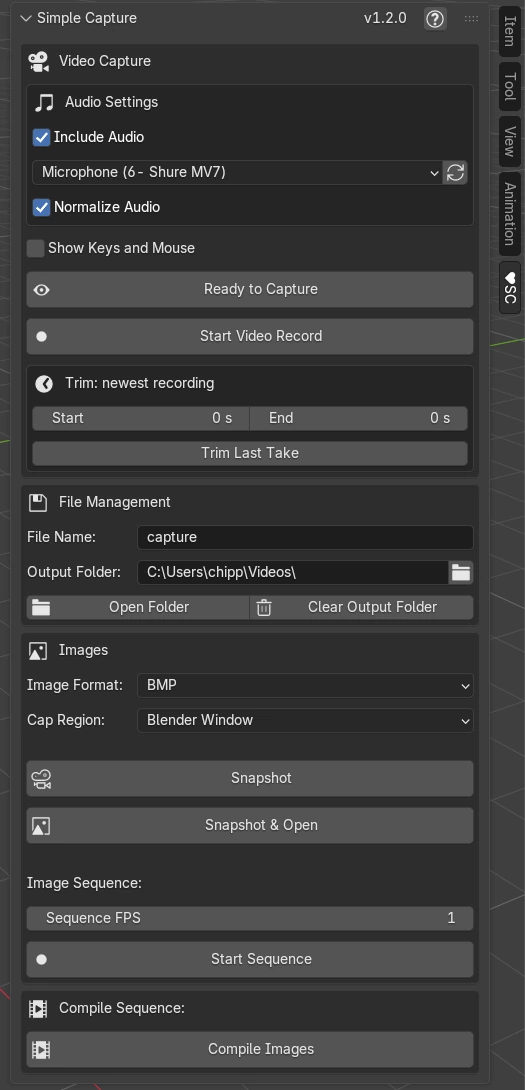
Press N in the 3D Viewport and pick the ♥SC tab. This is all of it, at actual size.
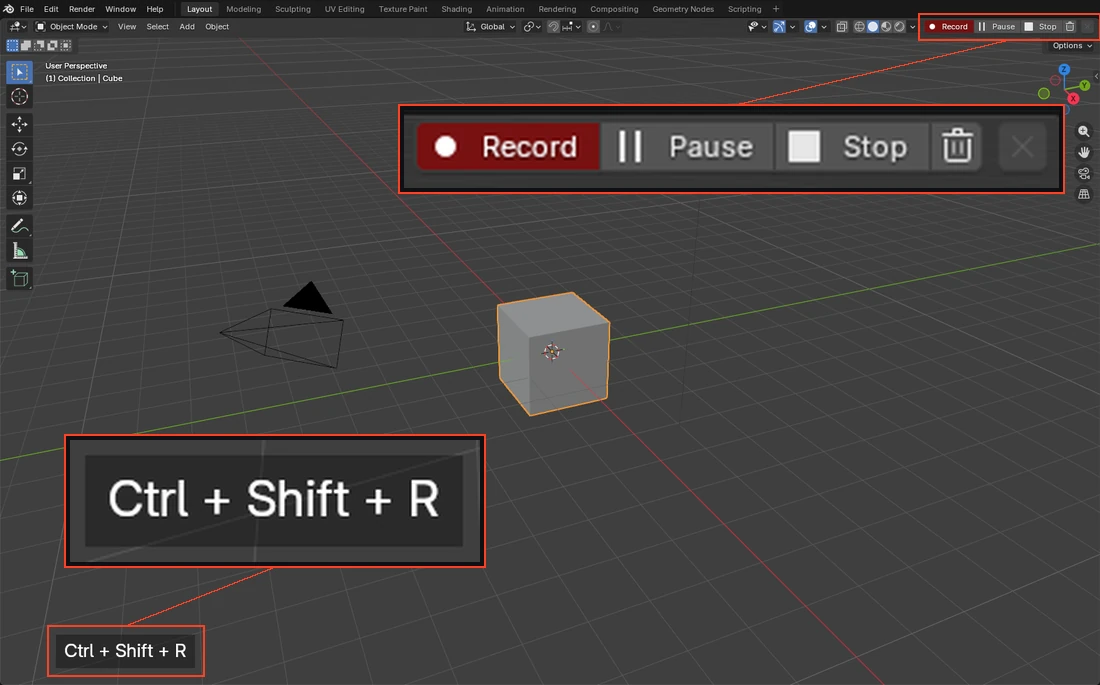
Press Ready to Capture and the sidebar closes. The controls move to the right end of the 3D Viewport header, so the panel is never in your video.
Every control on the panel, tagged by the kind of capture it belongs to.
One click saves the Blender window as BMP, PNG or JPG, without the mouse pointer; Snapshot & Open also shows it in your image viewer. Capture Region keeps the window as it is, or crops or pads to 1920 × 1080, 1080 × 1080 or 608 × 1080.
Start Sequence saves a frame at the Sequence FPS you set until you stop it. FFmpeg writes the frames in the background, so Blender stays responsive. Compile Images turns them into one MP4 at the current FPS. BMP frames compile fastest.
Ready to Capture hides the sidebar and puts Record, Pause, Stop and Delete in the 3D Viewport header. A paused stretch is cut out of the saved video. Delete sends the take in progress to the Recycle Bin; saved recordings are never touched.
Tick Include Audio, pick a microphone, and Normalize Audio levels the volume after you stop. For tutorials, Show Keys and Mouse displays the keys and mouse buttons you press in a corner of the largest 3D Viewport.
Trim Last Take saves a copy of the last recording without its first and last seconds. Nothing is re-encoded, so it is fast and loses no quality. Ctrl + Shift + Alt + F12 starts and stops a recording from the keyboard.
Clear Output Folder deletes only this add-on's captures, the files that match your File Name, and states the count first. Captures land on the right region wherever the Blender window sits, including a second display.
Yes. It isn't on Superhive or Gumroad: download the zip from the Simple Capture download folder. No account, no license key.
It is tested on Windows only. The code has macOS paths for snapshots, sequences and video, but they have not been tested on a Mac, so treat macOS as unsupported for now. Linux is not supported.
FFmpeg, and nothing else. It does all the capturing: snapshots, sequences, video, compiling and trimming. If FFmpeg isn't found, the panel shows an Install FFmpeg button that downloads it (about 115 MB) into the add-on's own folder and uses it right away. The download needs Allow Online Access switched on in Blender's preferences.
Yes. If FFmpeg is already on your computer, the add-on finds and uses it, and the install box never appears. If it misses your copy, set the environment variable SIMPLE_CAPTURE_FFMPEG to the full path of ffmpeg.exe and restart Blender.
Press Ready to Capture. The sidebar closes and the recording buttons move to the 3D Viewport header. Nothing is recorded until you press Record.
No. The recorded area is fixed when you press Record, and stays fixed while paused. Keep Blender in place and in front until you press Stop.
Set Capture Region to 1920 × 1080 and the capture is cropped or padded from the center. For a frame with no padding, size the Blender window to match first; Microsoft PowerToys FancyZones does that well.
No. For a timelapse, 1 FPS is plenty. Higher values use a lot of processor time and disk space, and the panel warns above 2. For smooth real-time motion, record video instead.
It is stopped and finalized first, so you aren't left with a broken MP4.
Simple Capture is free. It runs inside Blender, adds nothing to your scene, and writes ordinary image and MP4 files you own.
Free doesn't mean unsupported. Simple Capture comes from the maker of KIT OPS, backed by first-class support for Blender artists since 2019 and an active Discord where a human replies.
A still, a timelapse or a narrated recording, without leaving Blender. Simple Capture is free, small, and built for the way Blender artists already work.